Adding Subscribers
Once you have created a list, you will need to add people to it before sending any campaigns. There are two ways to add subscribers to a mailing list - individually and in bulk (i.e. CSV upload).
Adding Subscribers Individually
If you are keeping a smaller list that gets very few new subscribers at a time, this option is for you.
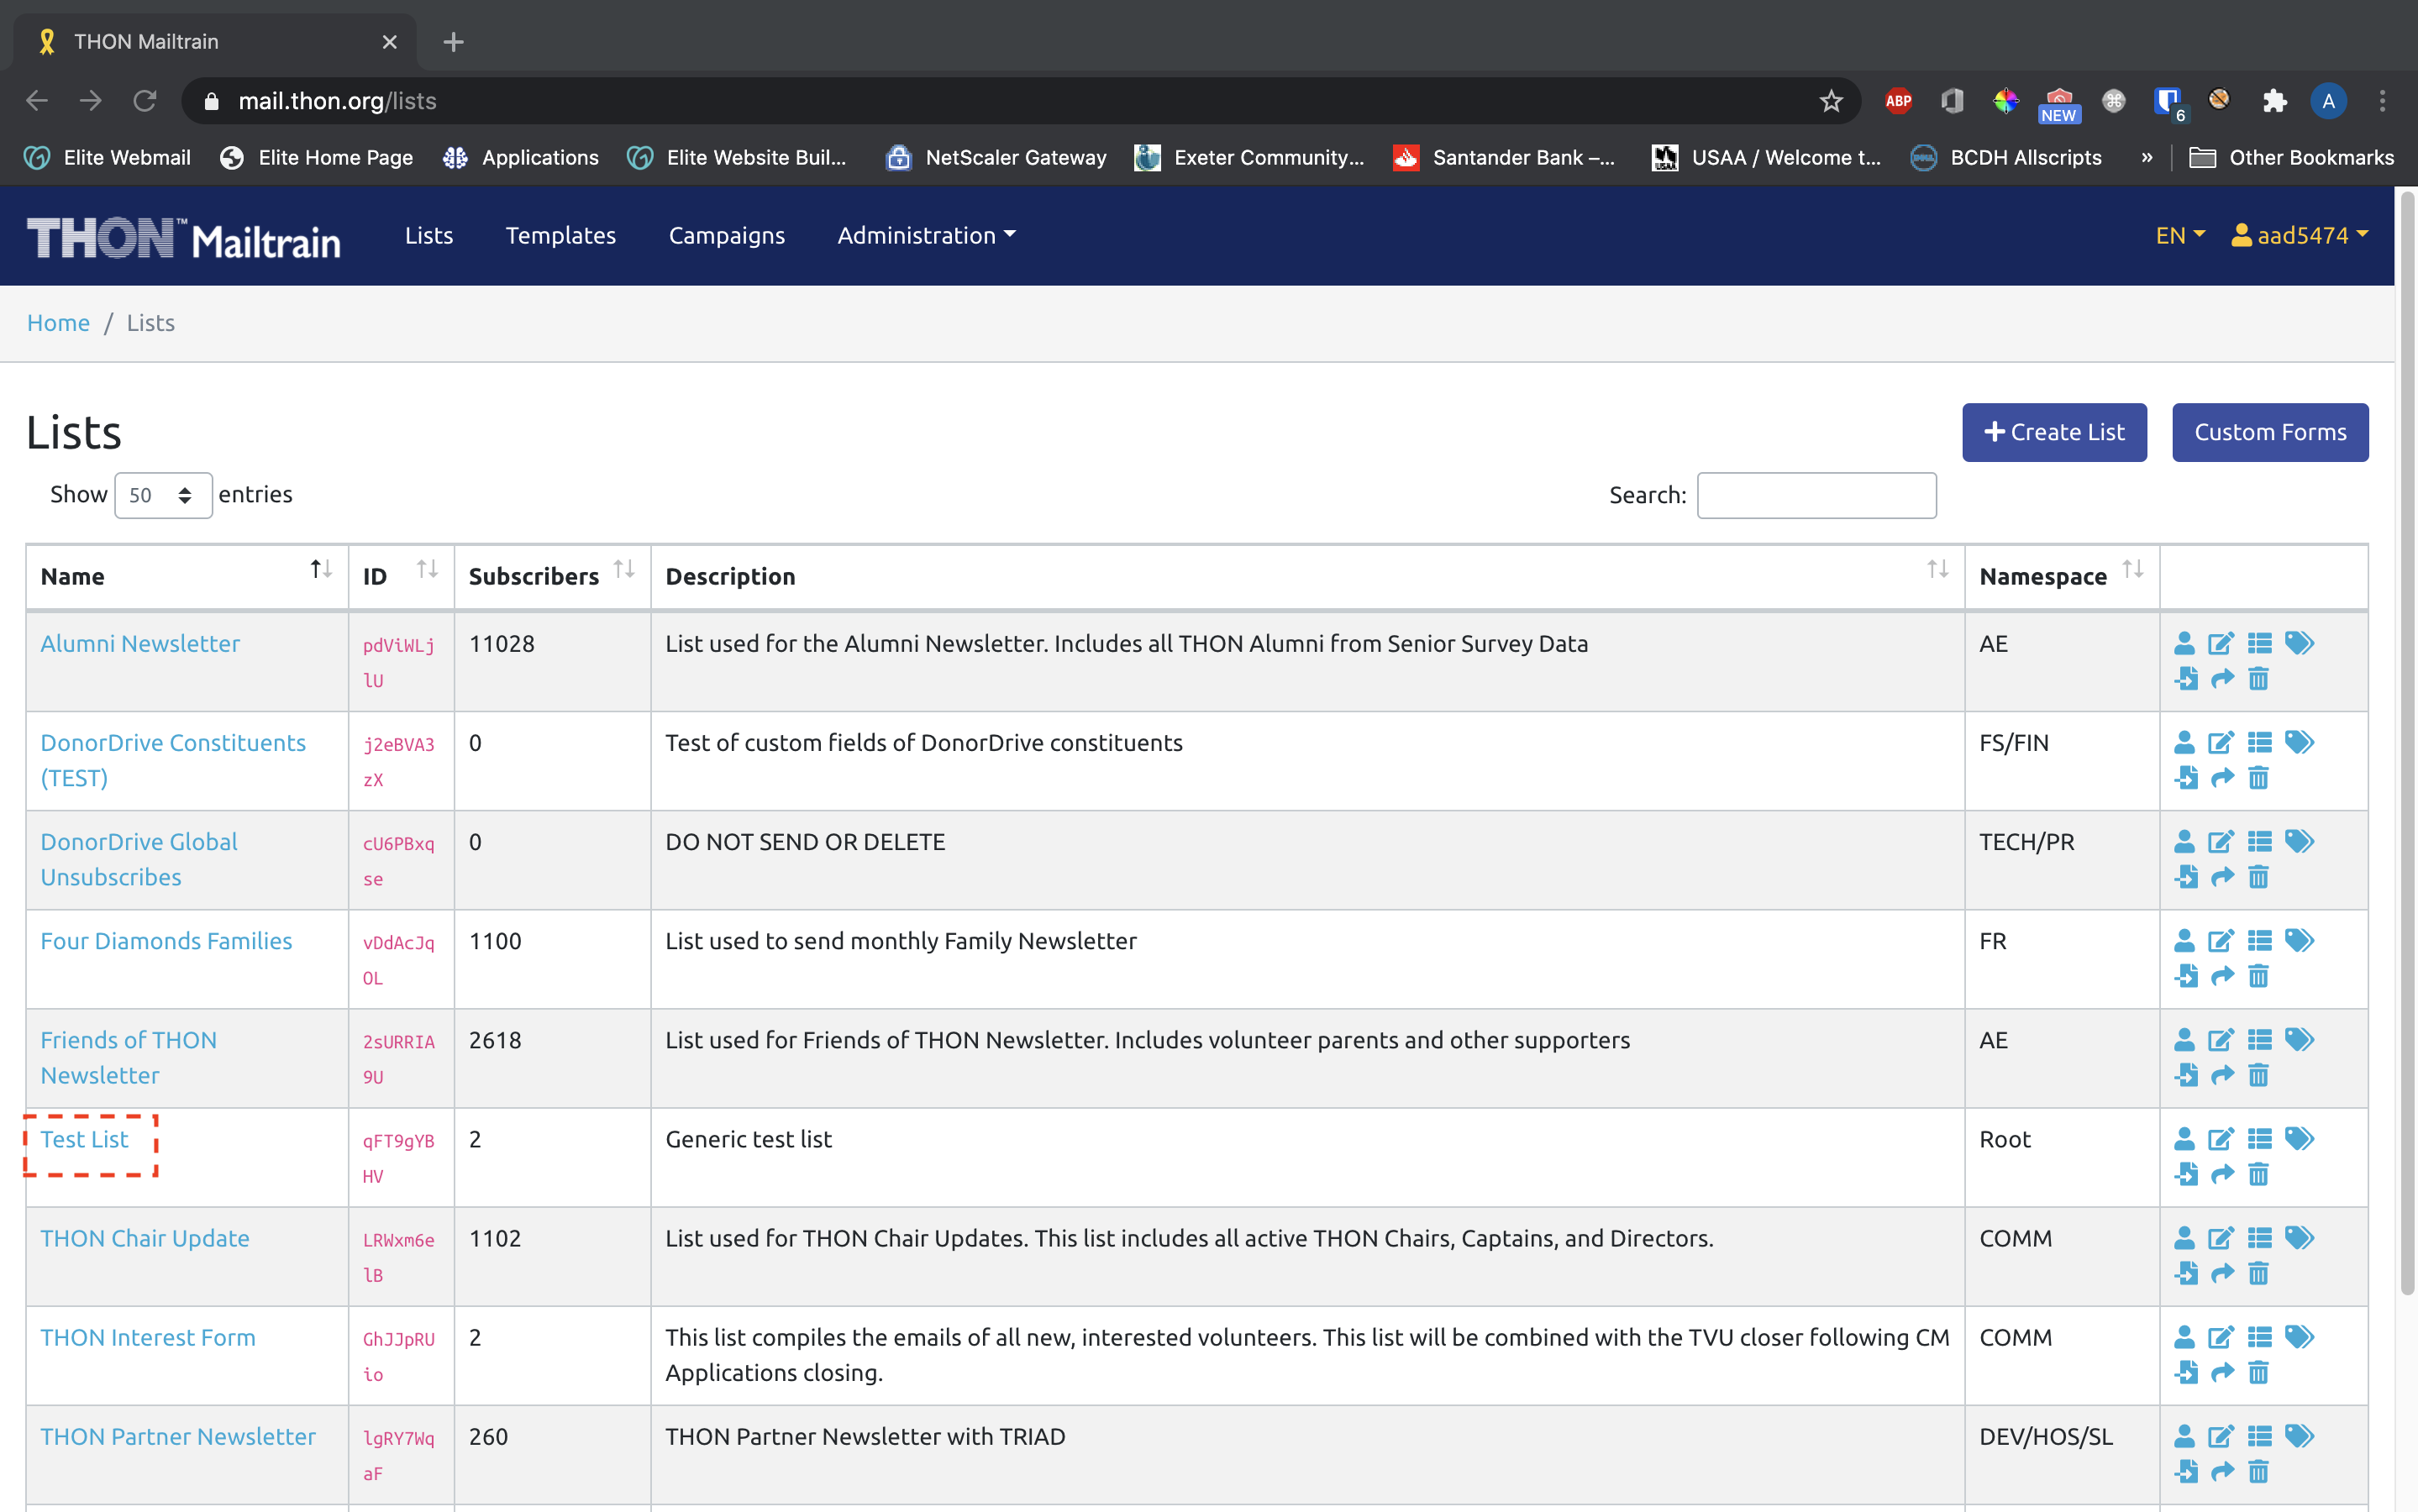
Accessing the Add Subscriber Page
To add an individual subscriber to a list, select the desired list on the Lists tab (Test List in this example) to and click +Add Subscriber:
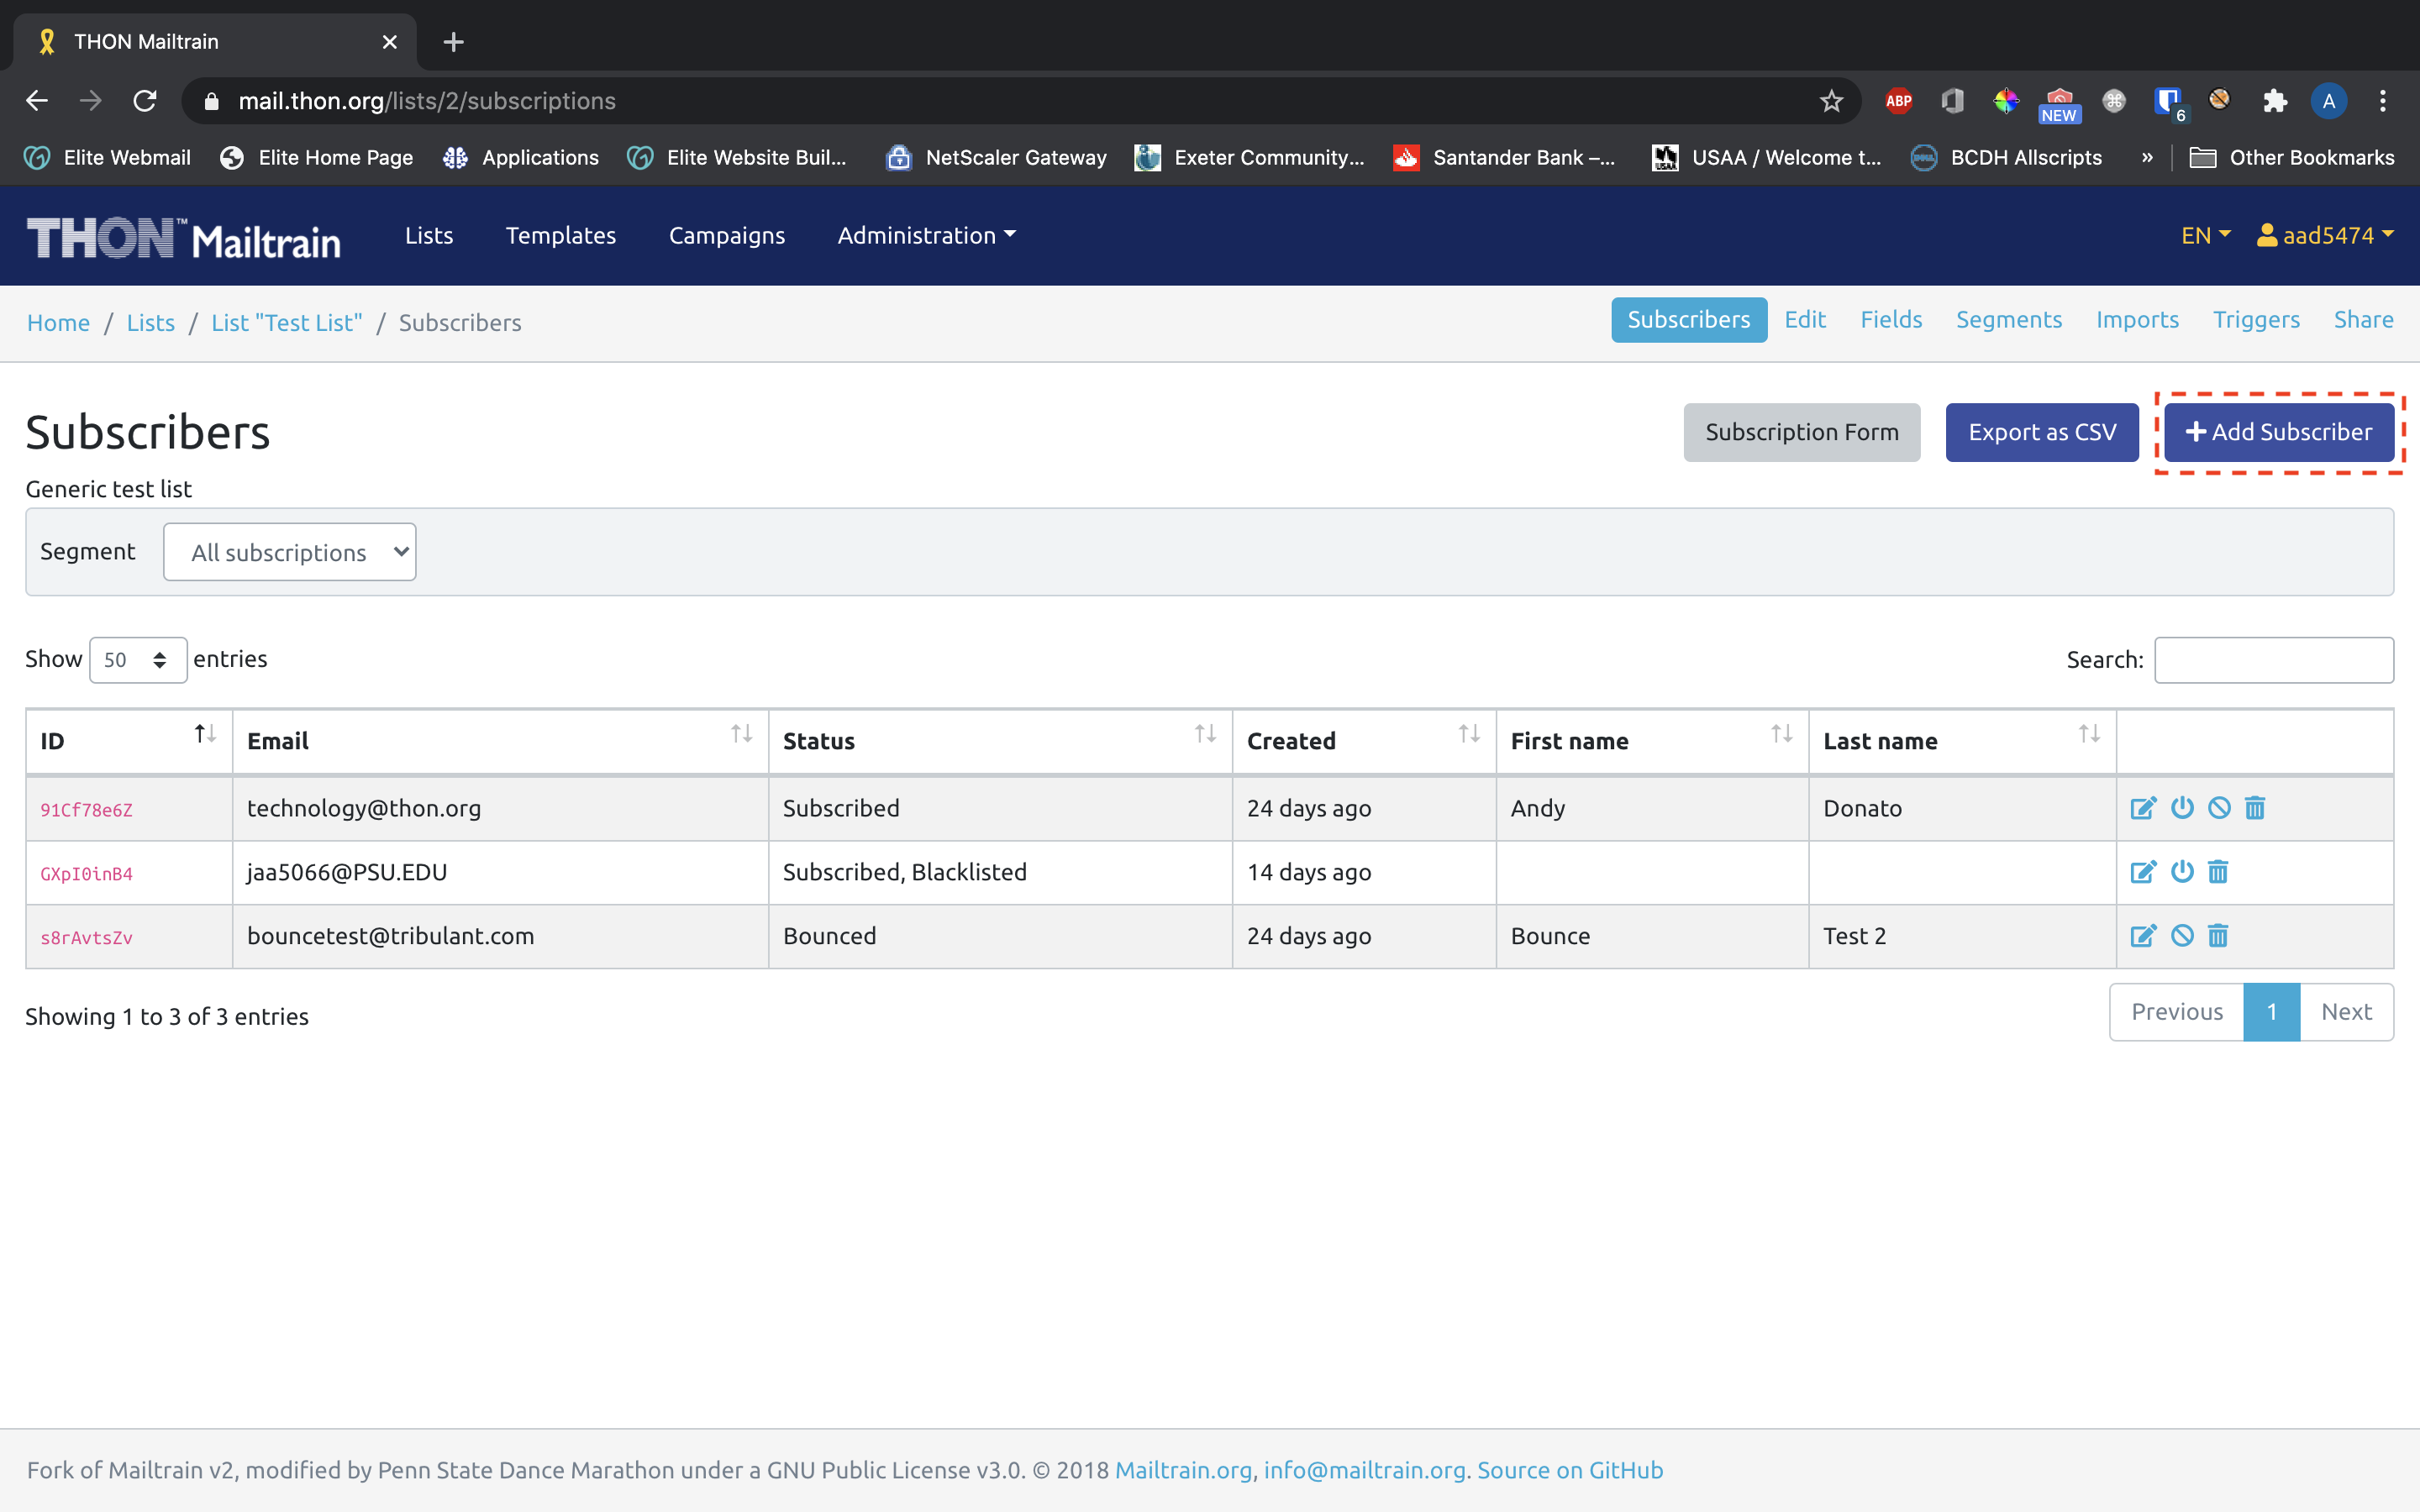
The link will take you to the following form:
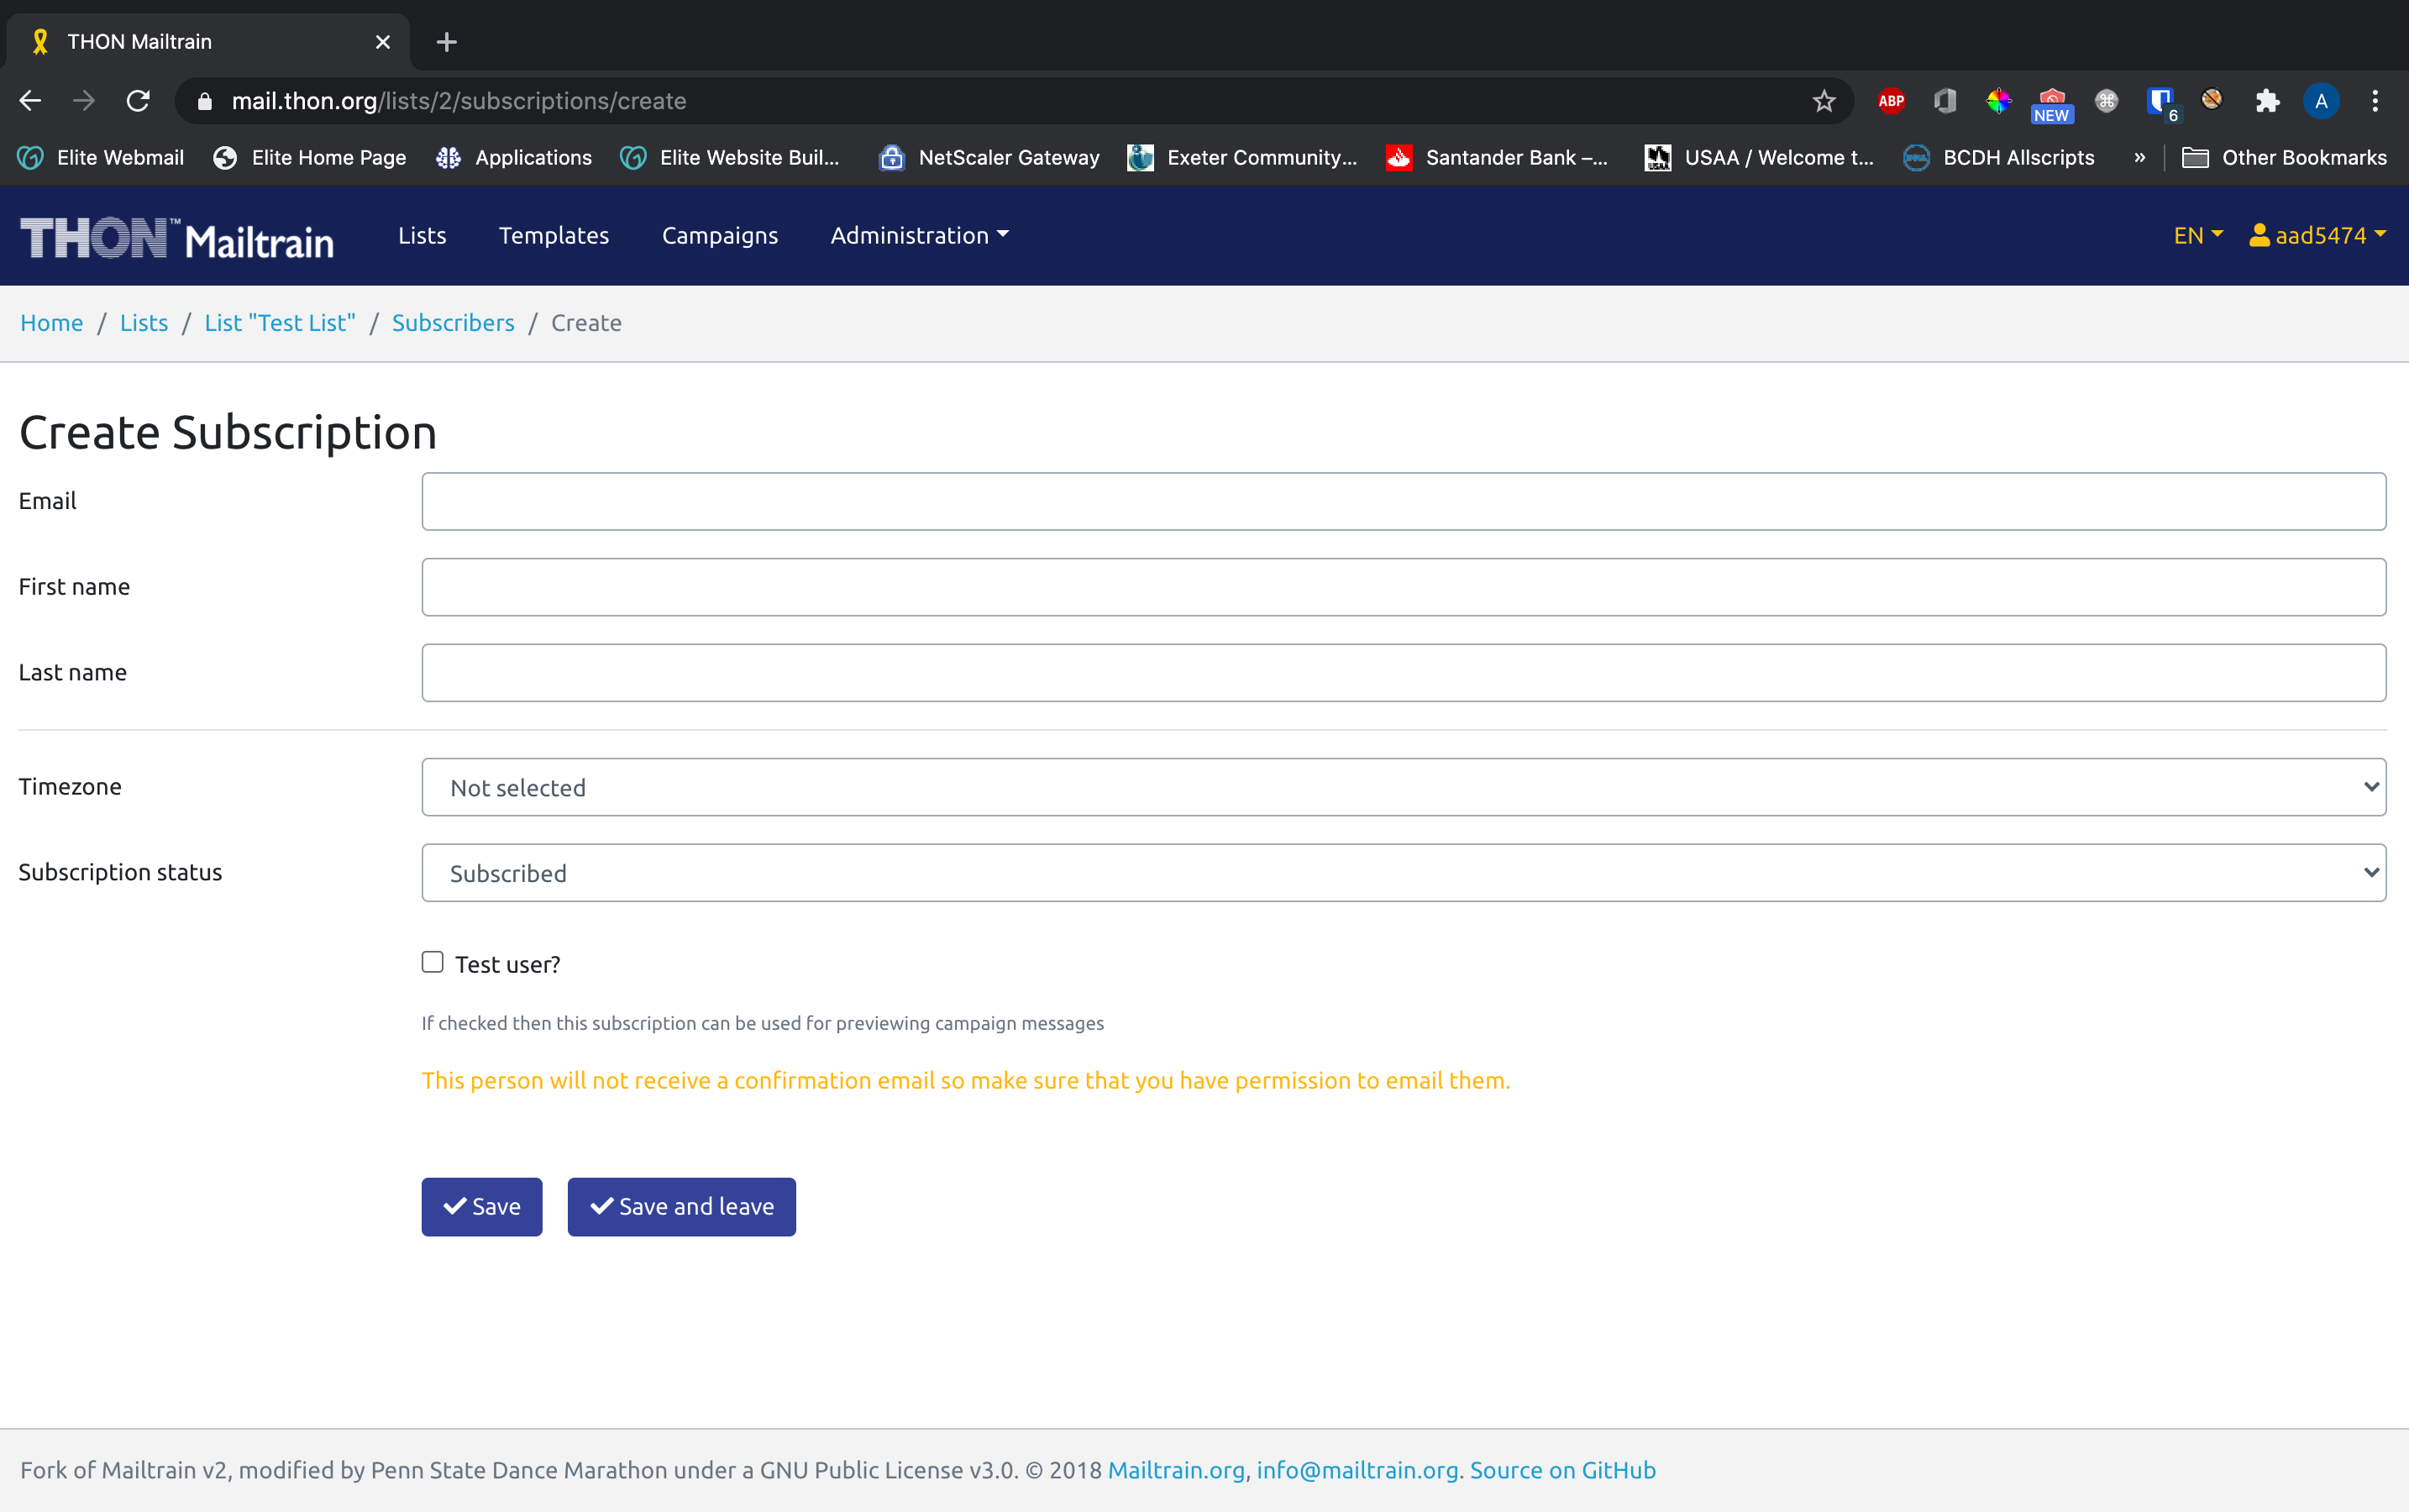
Filling out the Add Subscriber Form
You will need to fill out the following fields to add a subscriber:
|
Field Name
|
Description of Field
|
Notes
|
|---|---|---|
| The email address of the new subscriber | i.e. aad5474@psu.edu | |
| Custom Fields | If the list has custom fields configured (i.e. First Name, Last Name, Total Donated), there will be an input for each in the form | i.e. First Name - Andy, Last Name - Donato, Total Donated - $190 |
|
Timezone |
Not relevant for THON purposes | Leave Blank |
| Subscription Status | The status of the subscription | Set to Subscribed so that the subscriber receives campaigns |
| Test User? | If checked, the user can be sent test emails to check the look and feel of campaigns before launch | Leave Unchecked unless you are adding yourself as a test user |
Click Save to add the individual to the mailing list.
Importing Subscribers in Bulk
If you are maintaining a large list, or a list that gets large batches of new subscribers, this option is for you. Mailtrain offers an import tool that allows you to massive amounts of emails at a time via CSV upload.
File Size Limitations
Mailtrain has a maximum upload limit of 10MB, which translates to over 100K records if the CSV only contains 1 column. This should be plenty for THON applications, but if you are constantly finding yourself needing to split up imports, reach out to technology@thon.org to discuss a reconfiguration to allow larger files.
CSV File Guidelines
The import widget accepts comma-separated value (CSV) files only. The tool will break with any other file type. Use the following guidelines to format your CSV:
- Include headers on each column; Mailtrain will parse the file and interpret the first row as a header line
- Include a column for each field you wish to import. You will need at minimum 1 column for email addresses; include additional columns for things like first/last name as needed
- For best results, filter out all single quotes ('), double quotes ("), and backticks (`). Also check to ensure that each row has the same number of columns.
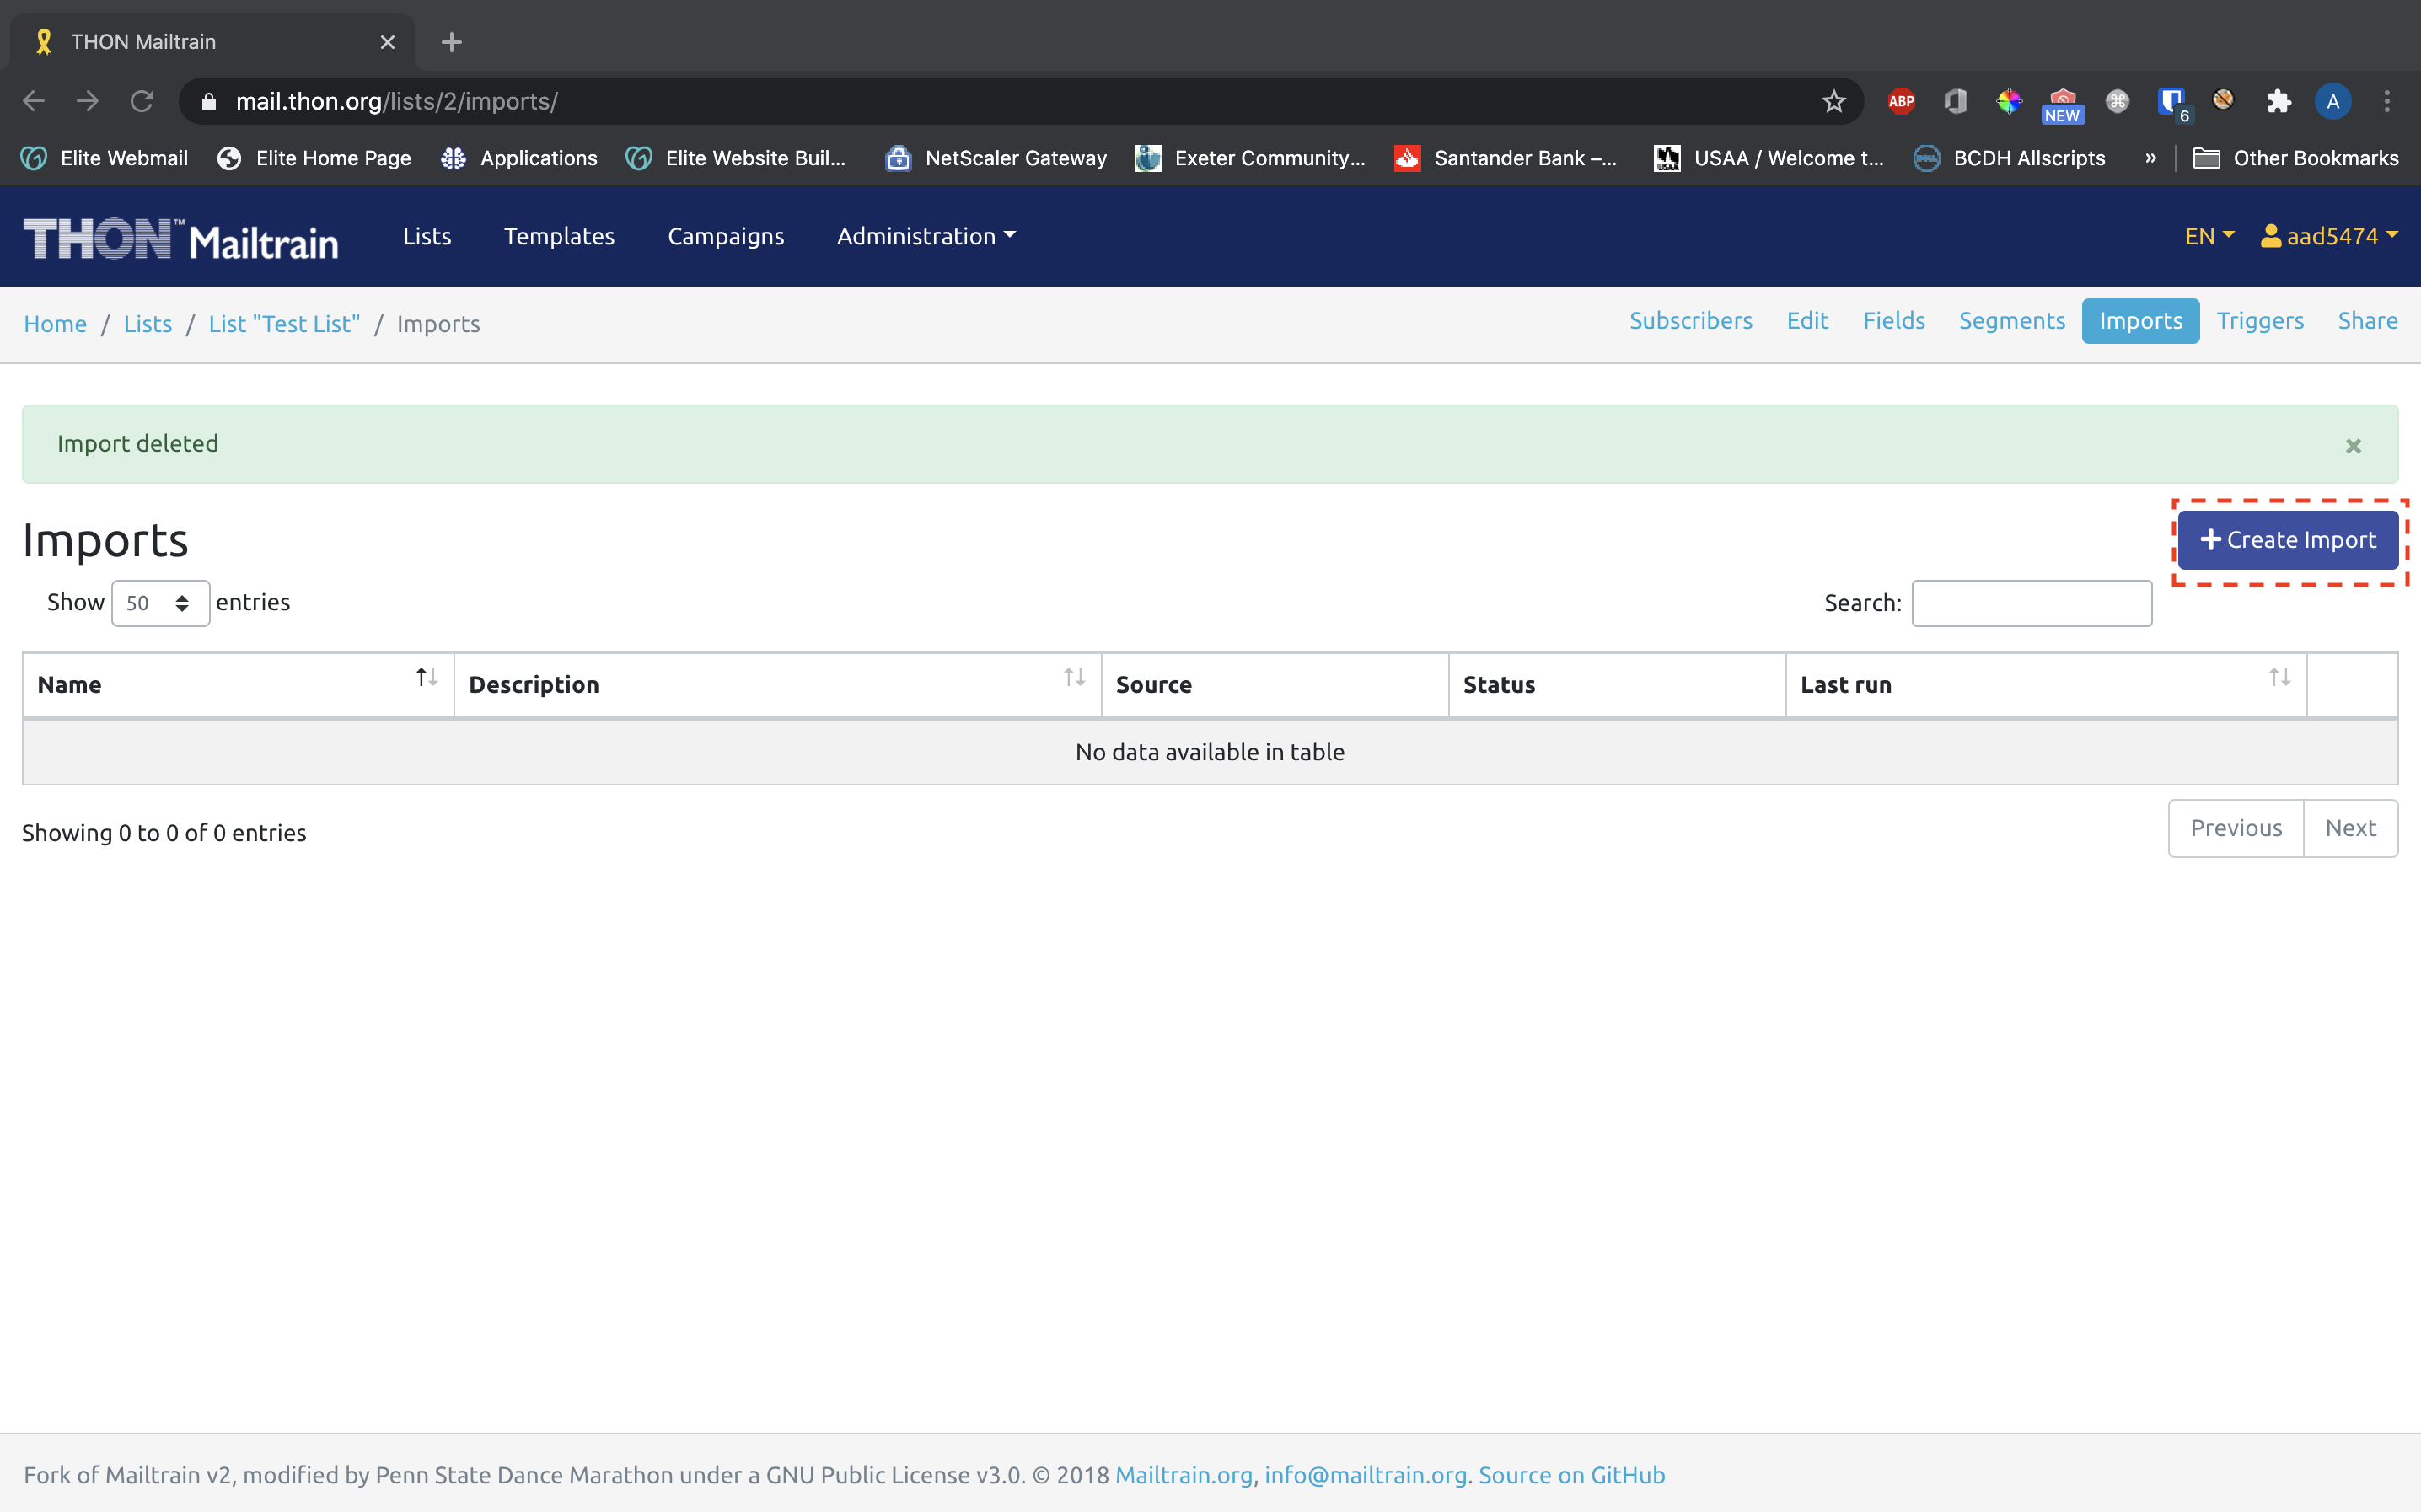
Accessing the Subscriber Import Tool
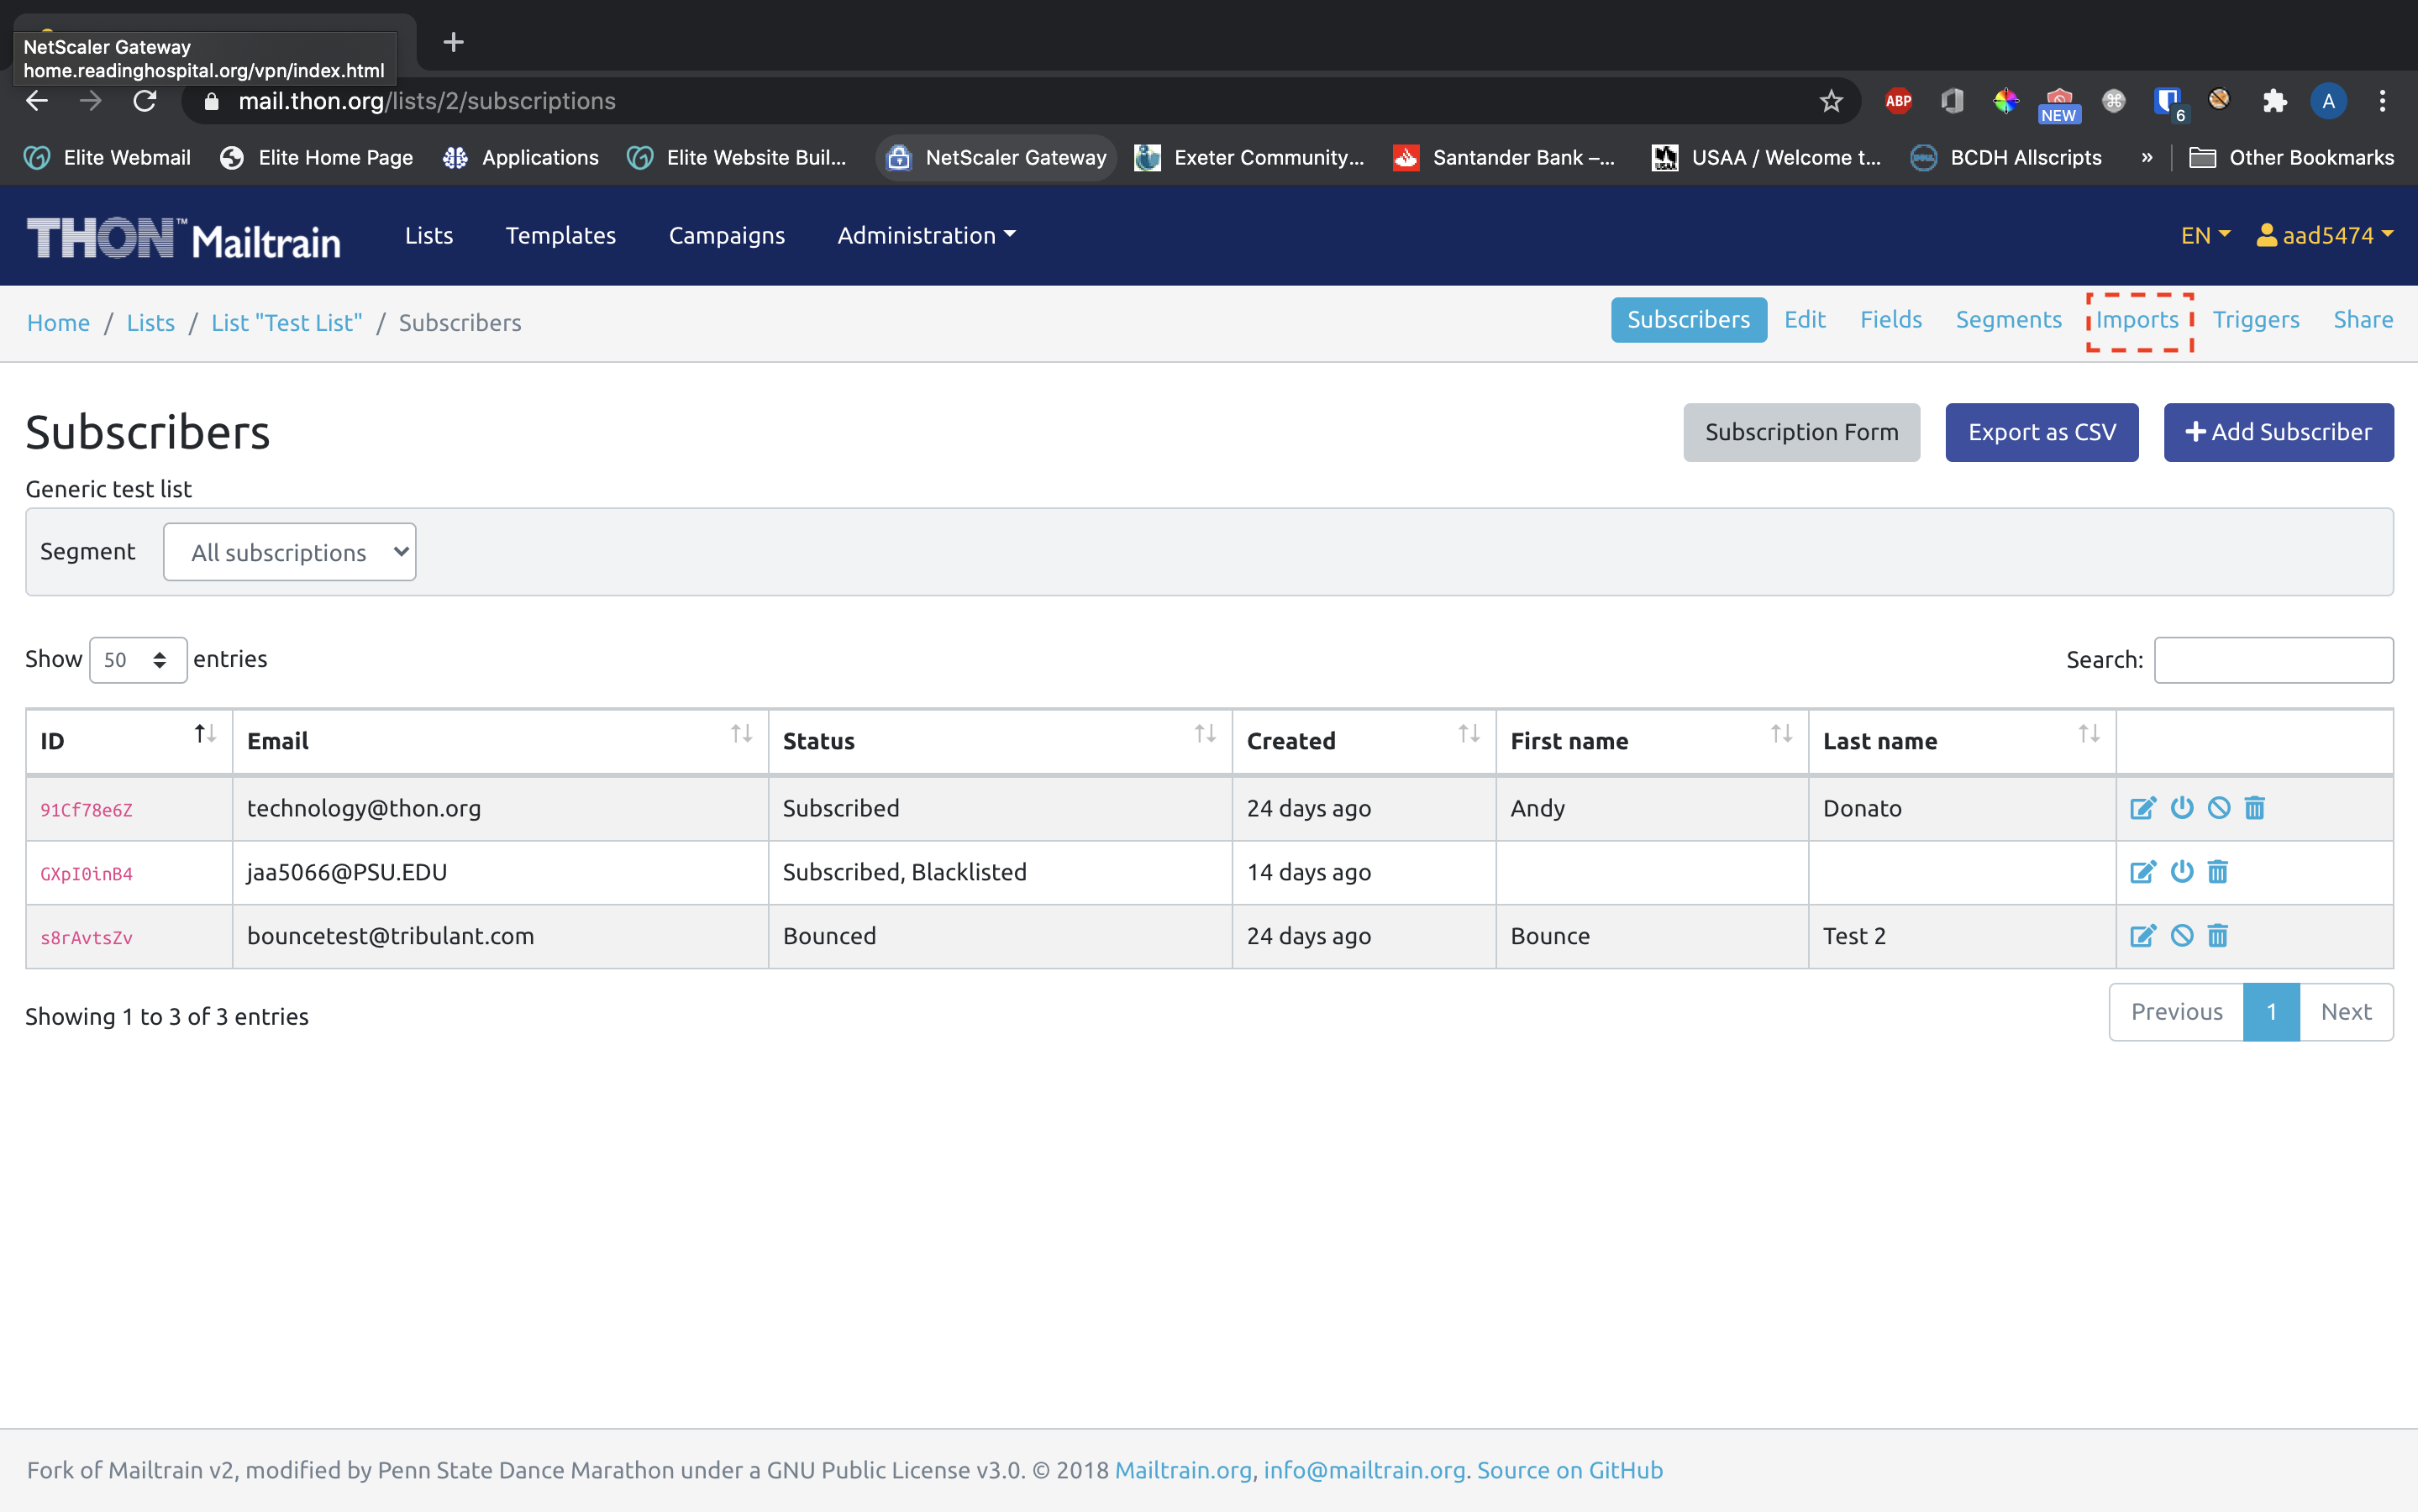
To access the import tool, select the list on the Lists tab and click on Imports in the secondary navbar.

On the ensuing page, click +Create Import

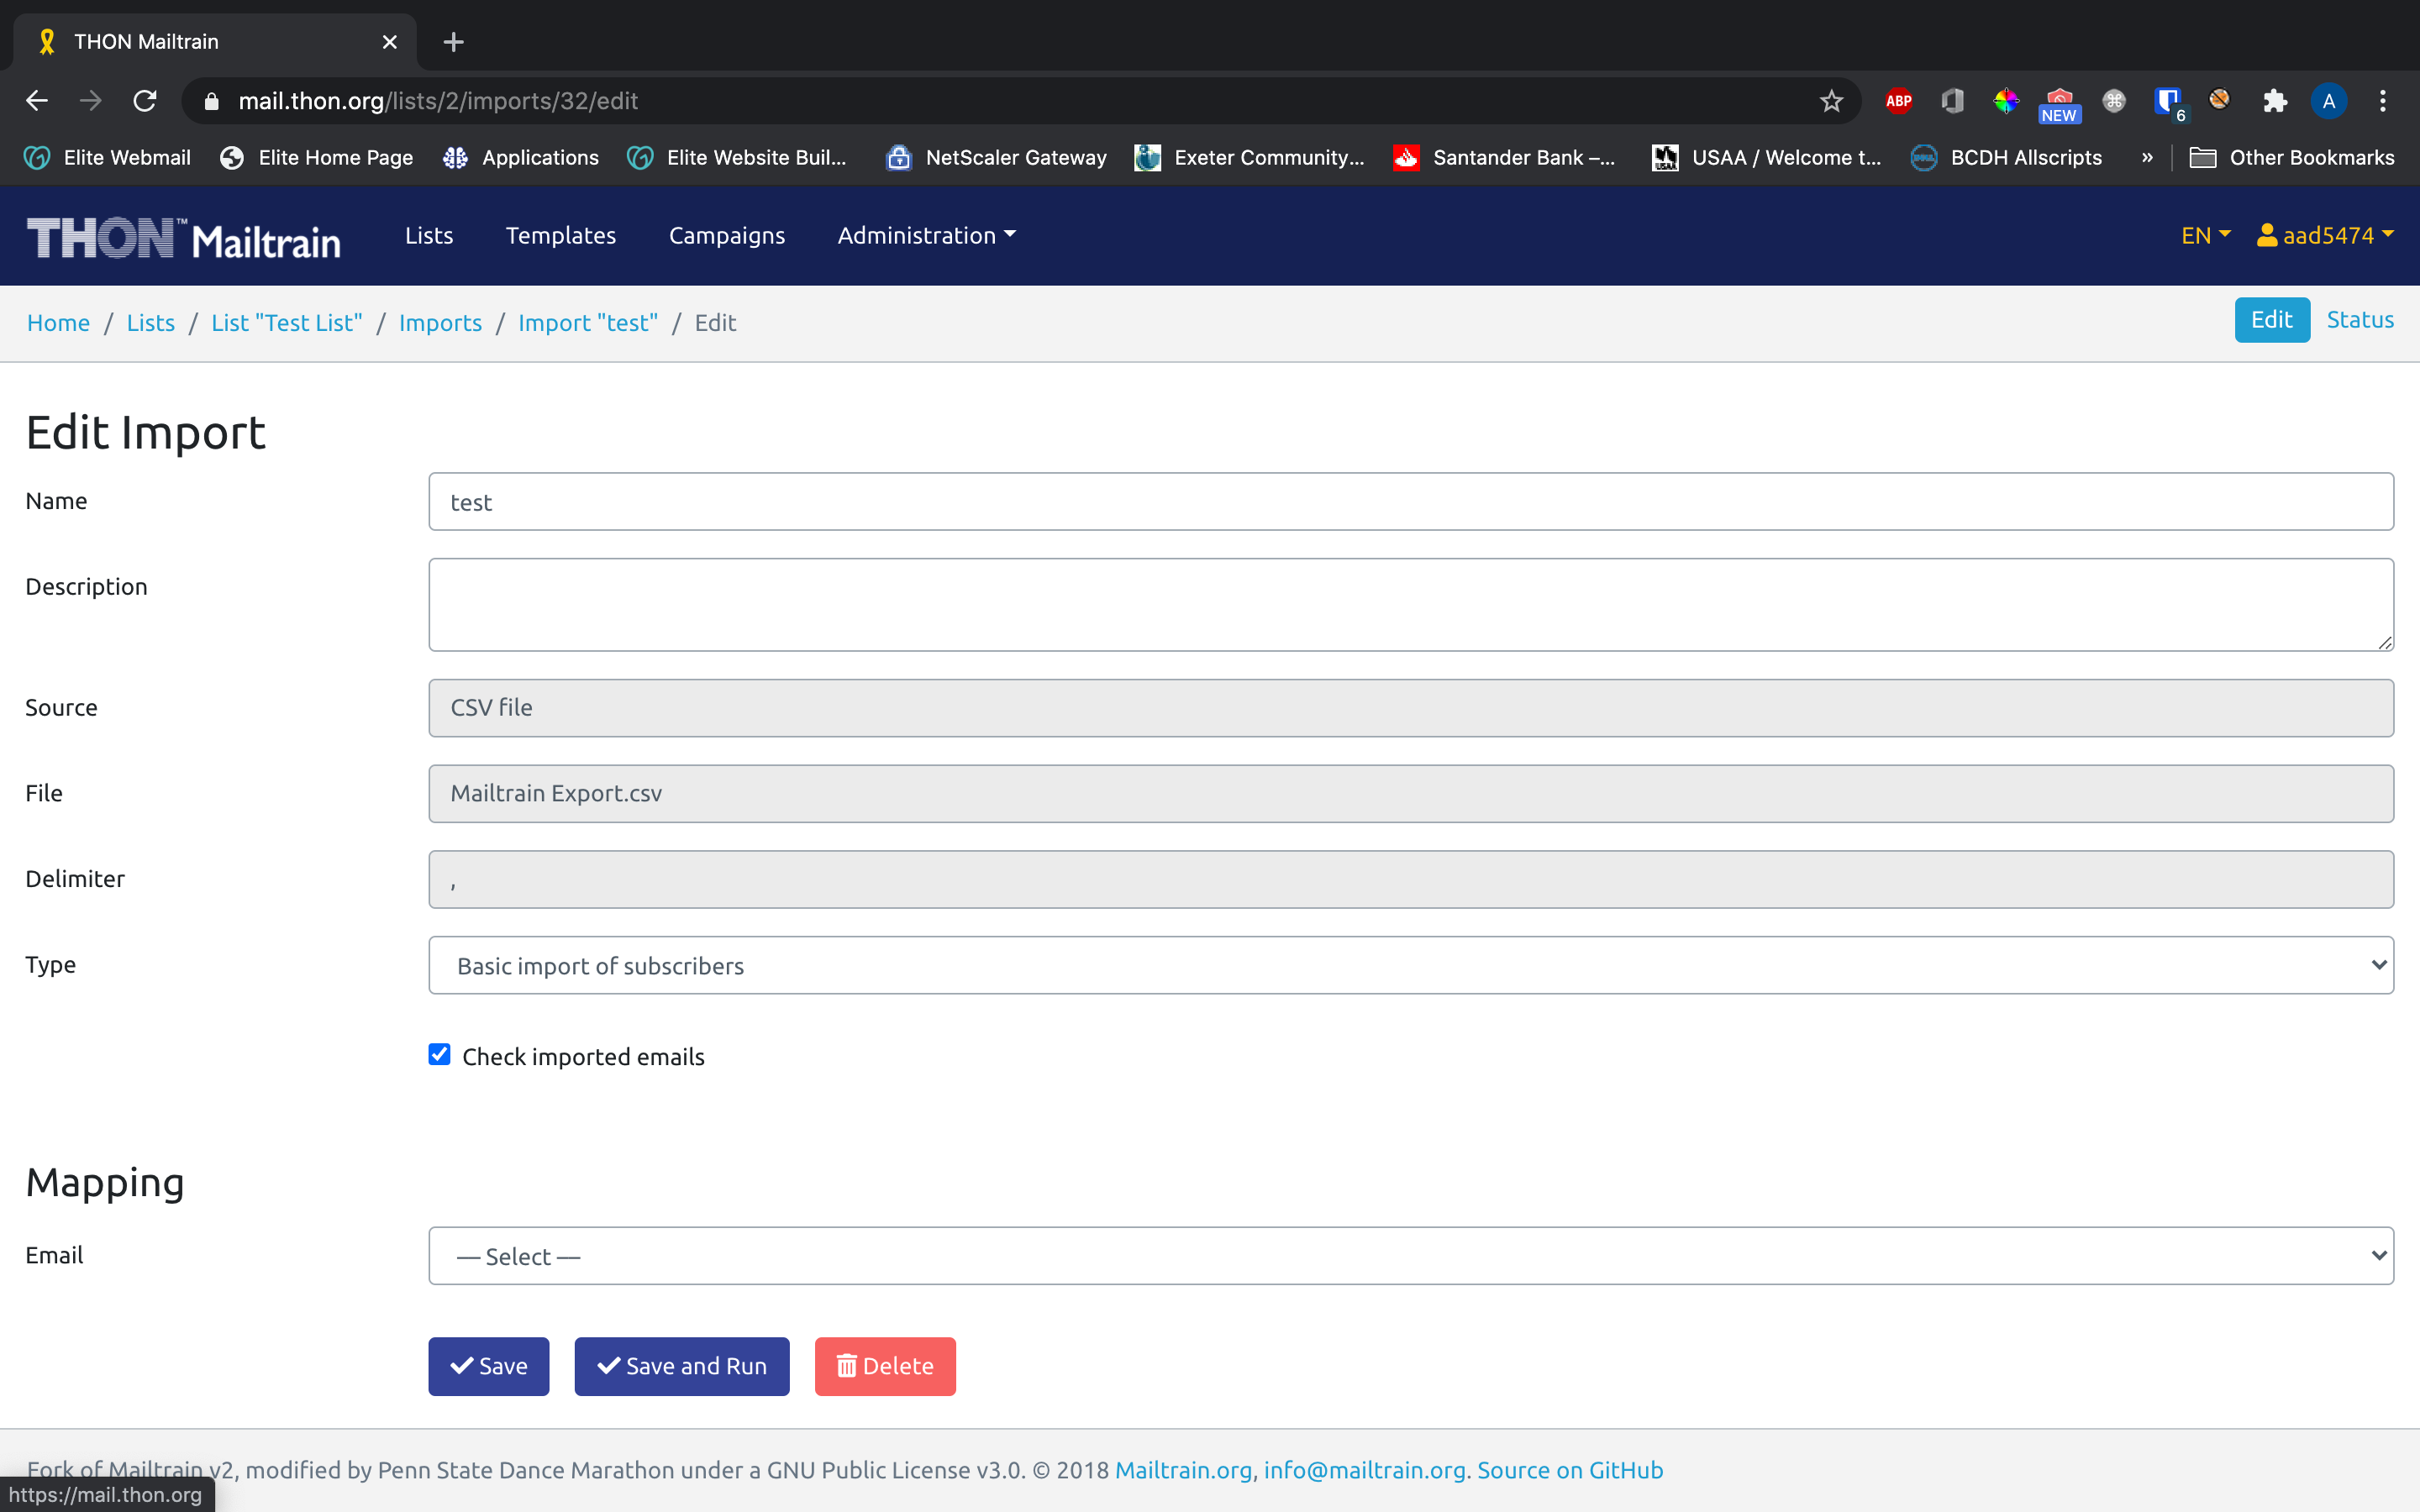
Filling out the Create Import Form (Part 1)
You will need to fill out the following fields to create an import:
|
Field Name
|
Description of Field
|
Notes
|
|---|---|---|
|
Field Name
|
Description of Field
|
Notes
|
| Name | The primary identifier of the import | i.e. Initial Import 7/26. Not very important, perhaps good for record-keeping |
| Description | A verbose description of the import | Also not very important, you can leave blank if you'd like |
|
Source |
The file type of the import | Select CSV File (should be default/the only option) |
| File | The file to import | Select your CSV file with the file picker |
| Delimiter | The separator between column values in the file | Leave As-Is (,) "Comma-separated value" implies that the separator must be a comma |
Click Save and Edit Settings to initiate the import process.
Pre-processing the Import
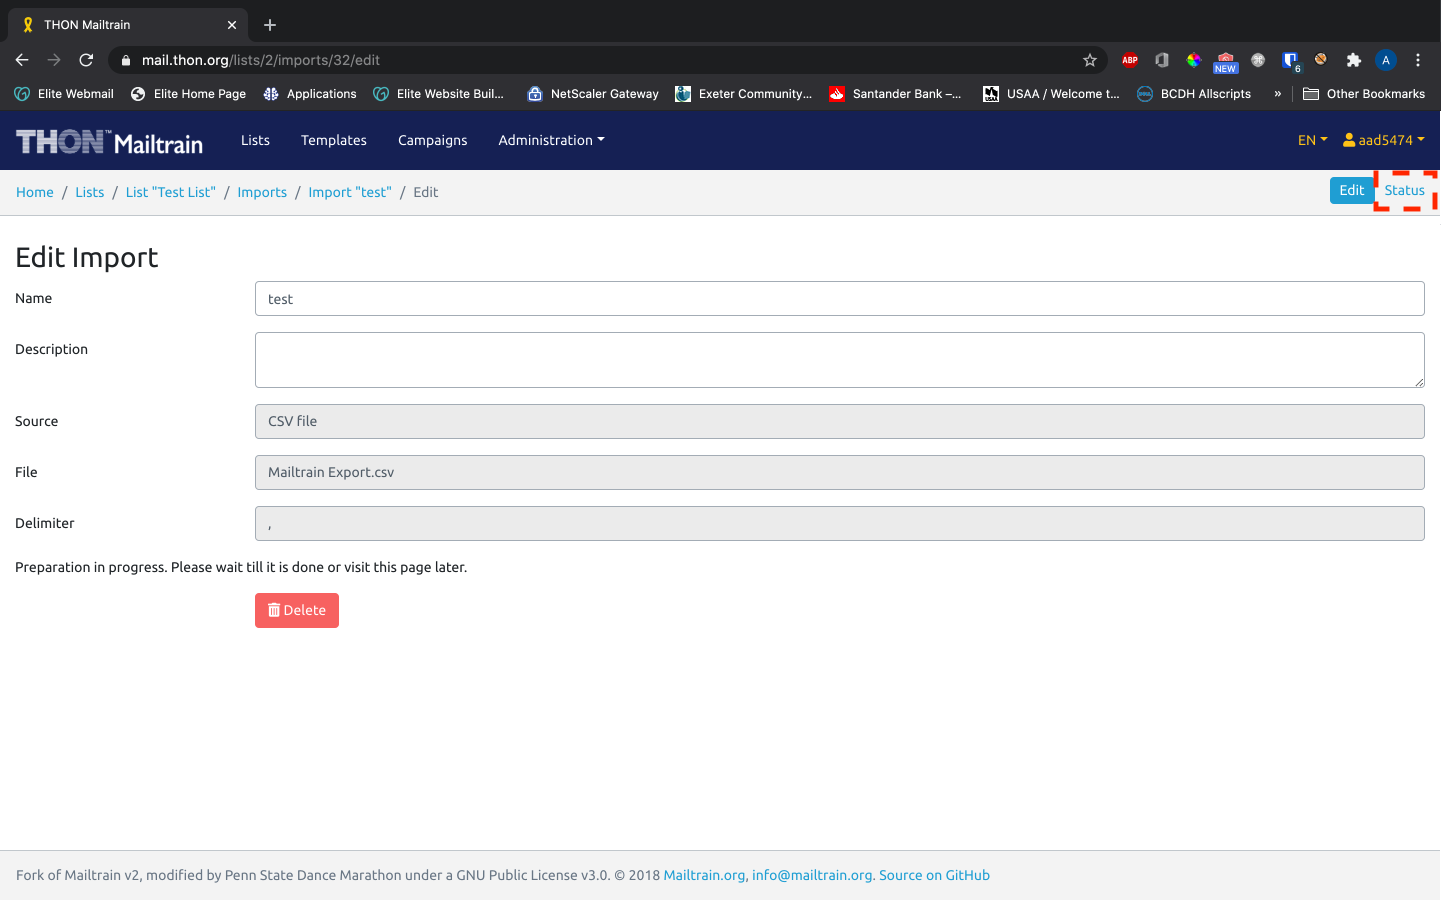
After you click Save, Mailtrain will attempt to pre-process your CSV file for errors or invalid characters. You see the following screen as the file processes:

Once the import finishes running, you will see the following page. Notice the extra fields and the Mapping section added below the existing fields:
If the additional content has not rendered on the page within 5 minutes, it's likely that the import did not succeed. You can check the status of your imports by clicking the Status tab in the sub-navbar:
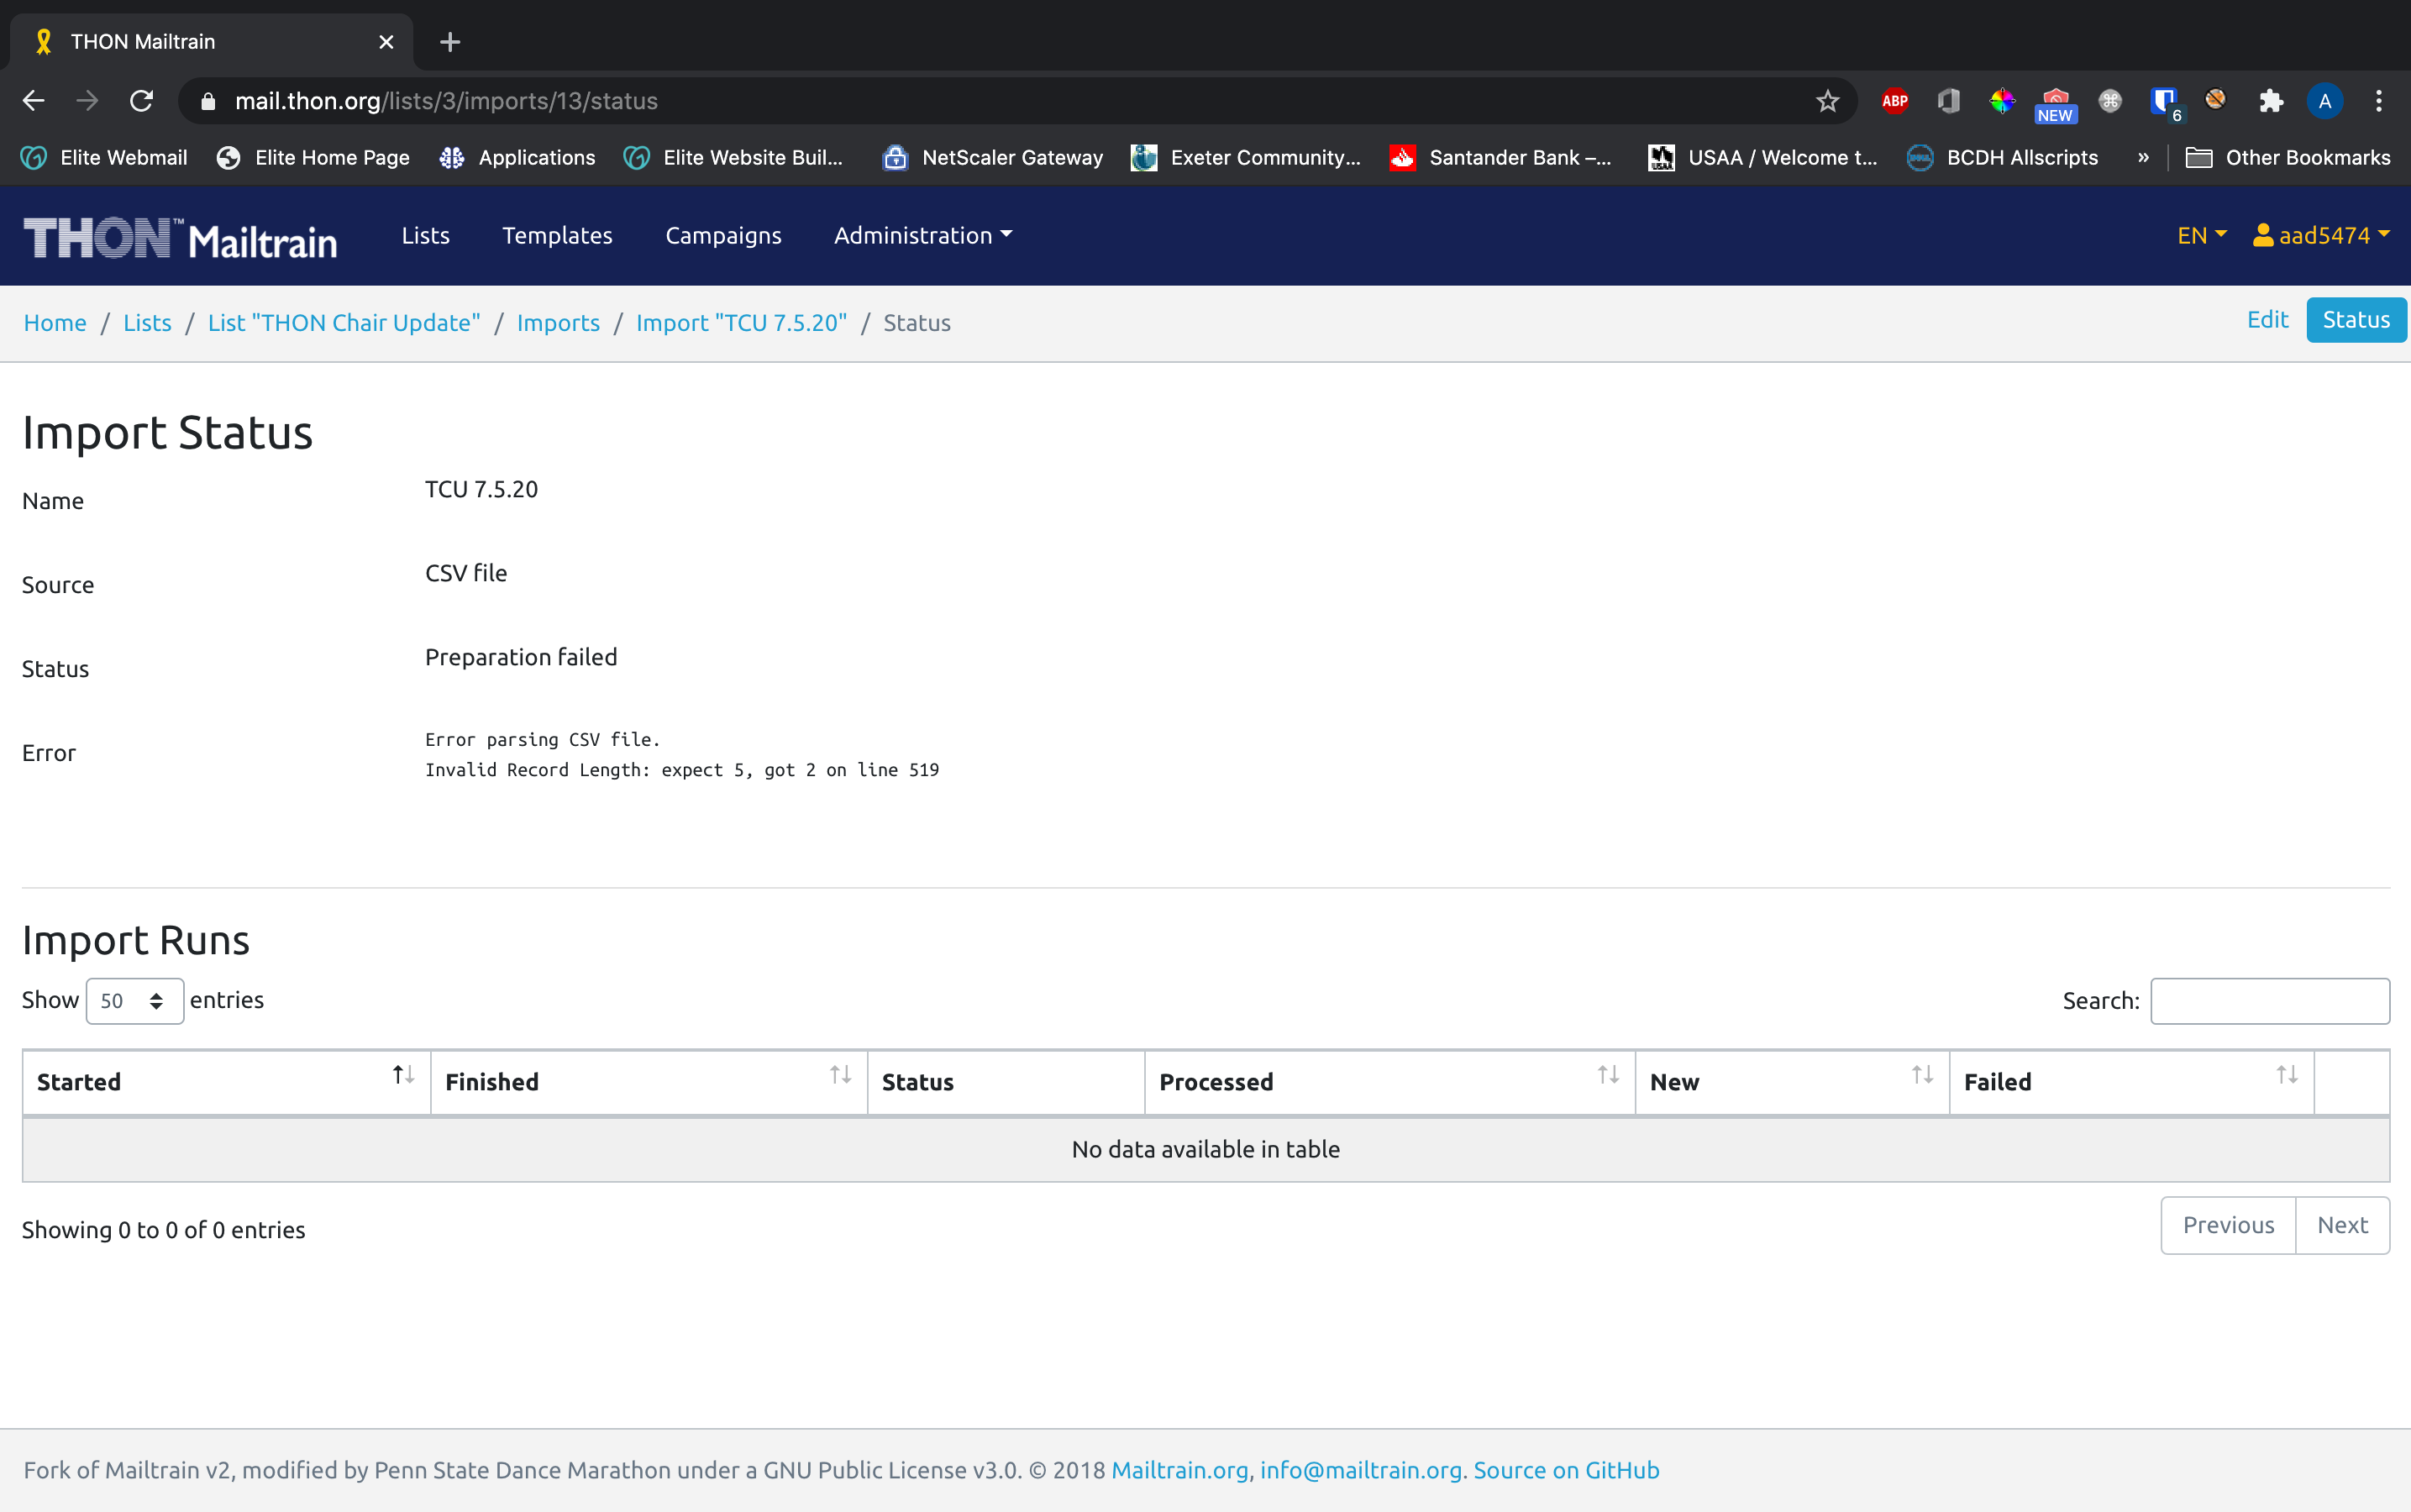
f the status reads Preparation failed, the pre-processing effort was unsuccessful. The Error line can provide useful diagnostic information about where the error occured; see Import Creation Troubleshooting below for more information.
Filling out the Import Creation Form (Part 2)
Once the import successfully pre-processes, you will need to fill out the following additional fields before running it:
|
Field Name
|
Description of Field
|
Notes
|
|---|---|---|
|
Field Name
|
Description of Field
|
Notes
|
| Type | The type of import to run |
In Mailtrain, the import tool can be used both to import subscribers and mass-unsubscribed emails from a list. IF YOU ARE LOOKING TO MASS-ADD PEOPLE: select Basic import of subscribers IF YOU ARE LOOKING TO MASS-UNSUBSCRIBE PEOPLE: select Unsubscribe emails |
| Check imported emails | If checked, Mailtrain will do addtional processing of each record to verify that each address is syntictially valid based on email standards (i.e. filtering out addresses like "aad5474@@psu.edu", ".aad5474@psu.edu", "aad5474@psuedu", etc. | Leave checked - these little checks save us the trouble of receiving bouncebacks in the future |
|
Mapping (multiple fields) |
Dropdown fields for each field added to the subscriber list | This field maps columns of the CSV file to fields in the Mailtrain list. Each dropdown will have a choice representing a column of the CSV file. Select the appropriate column for each field to match up the data rows. |
Click Save and Run to launch the import.
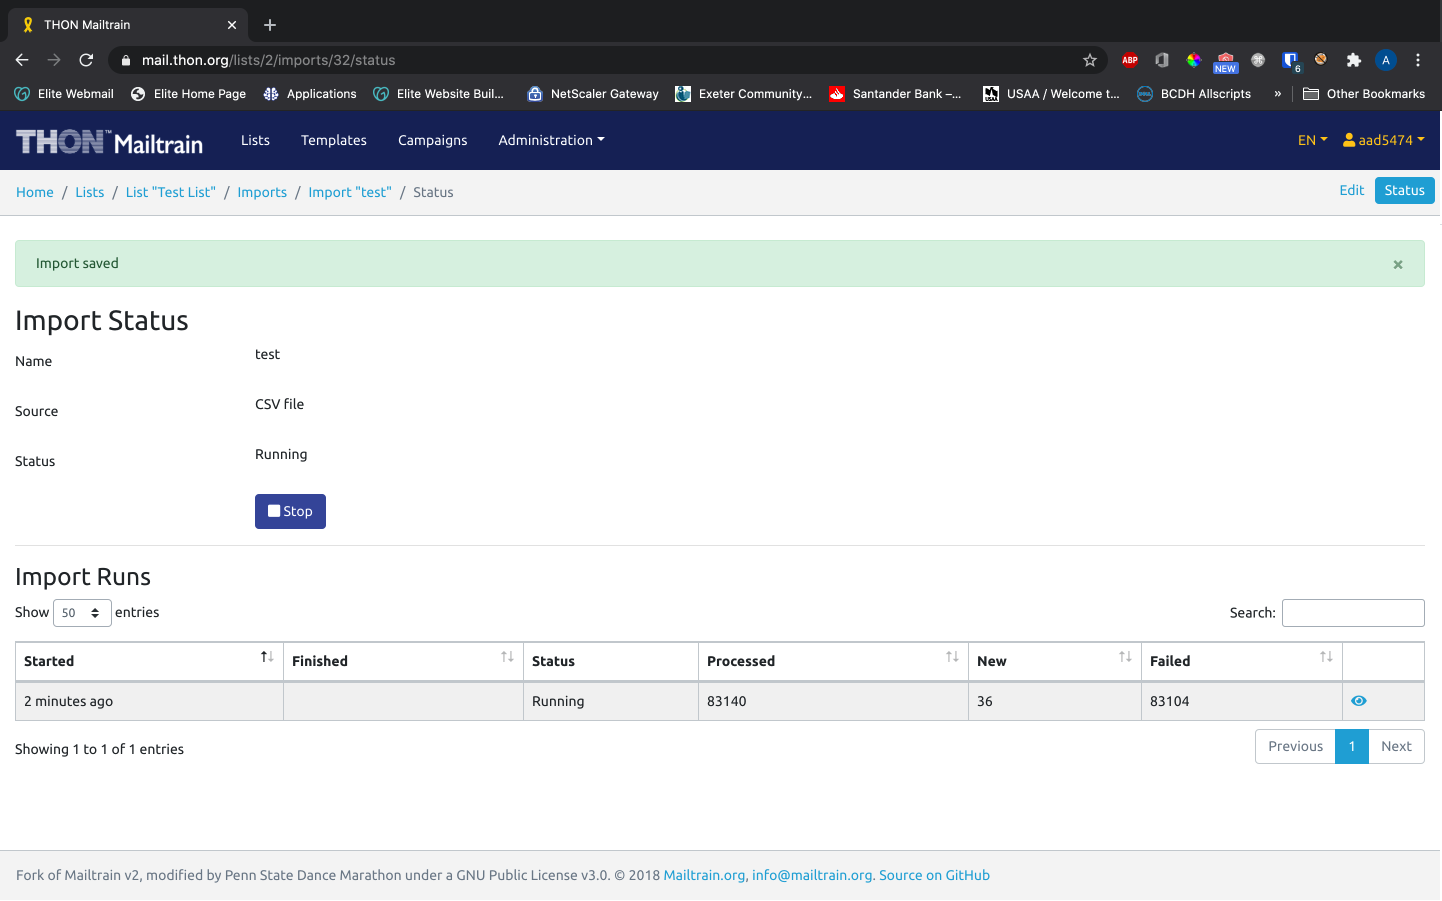
Monitoring the Status
Upon running, you will be redirected to the Status page:
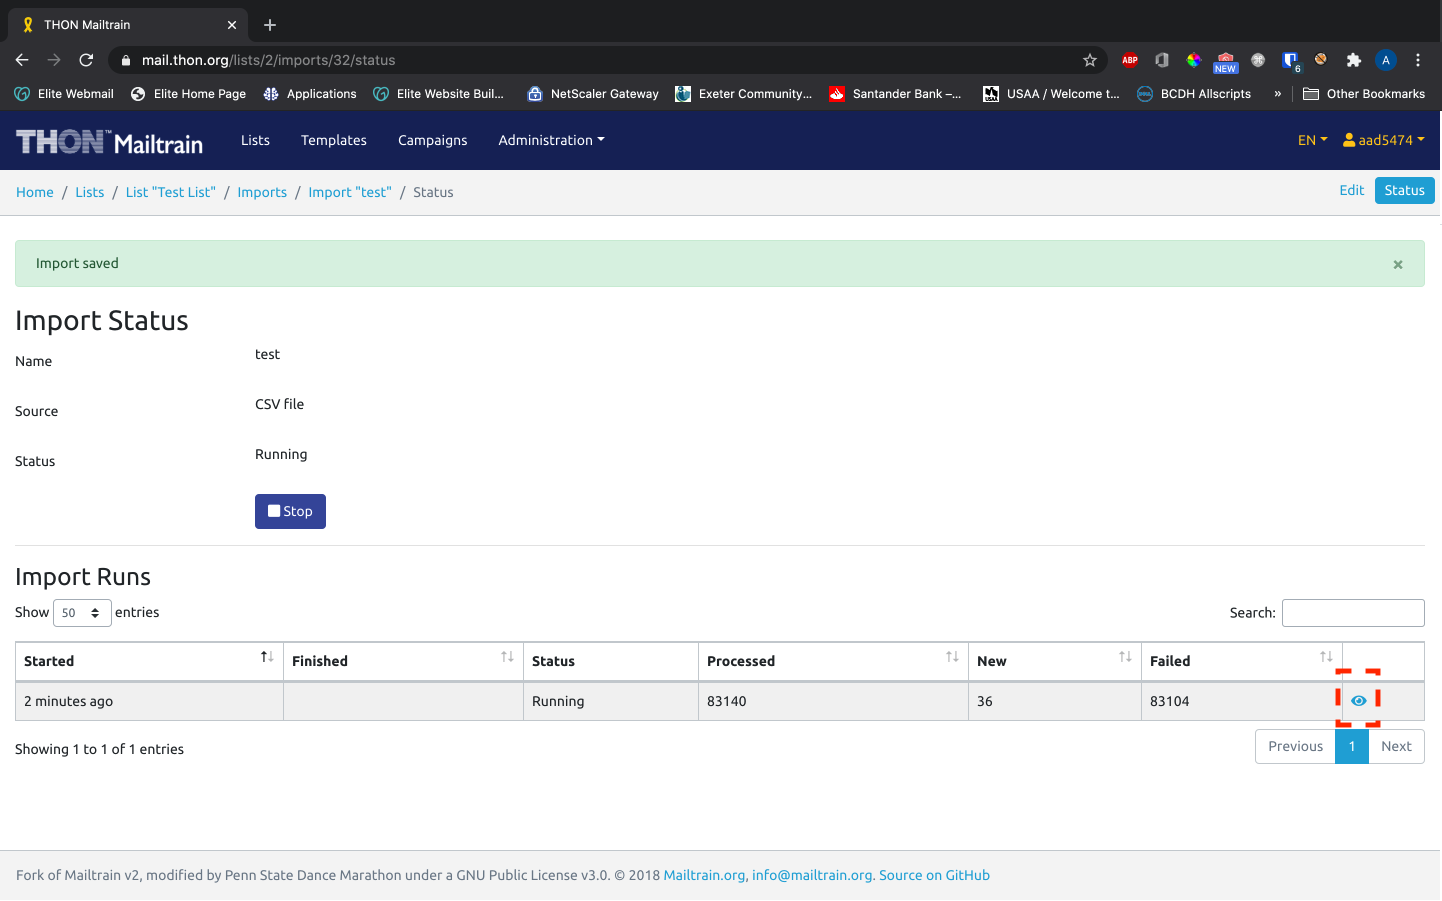
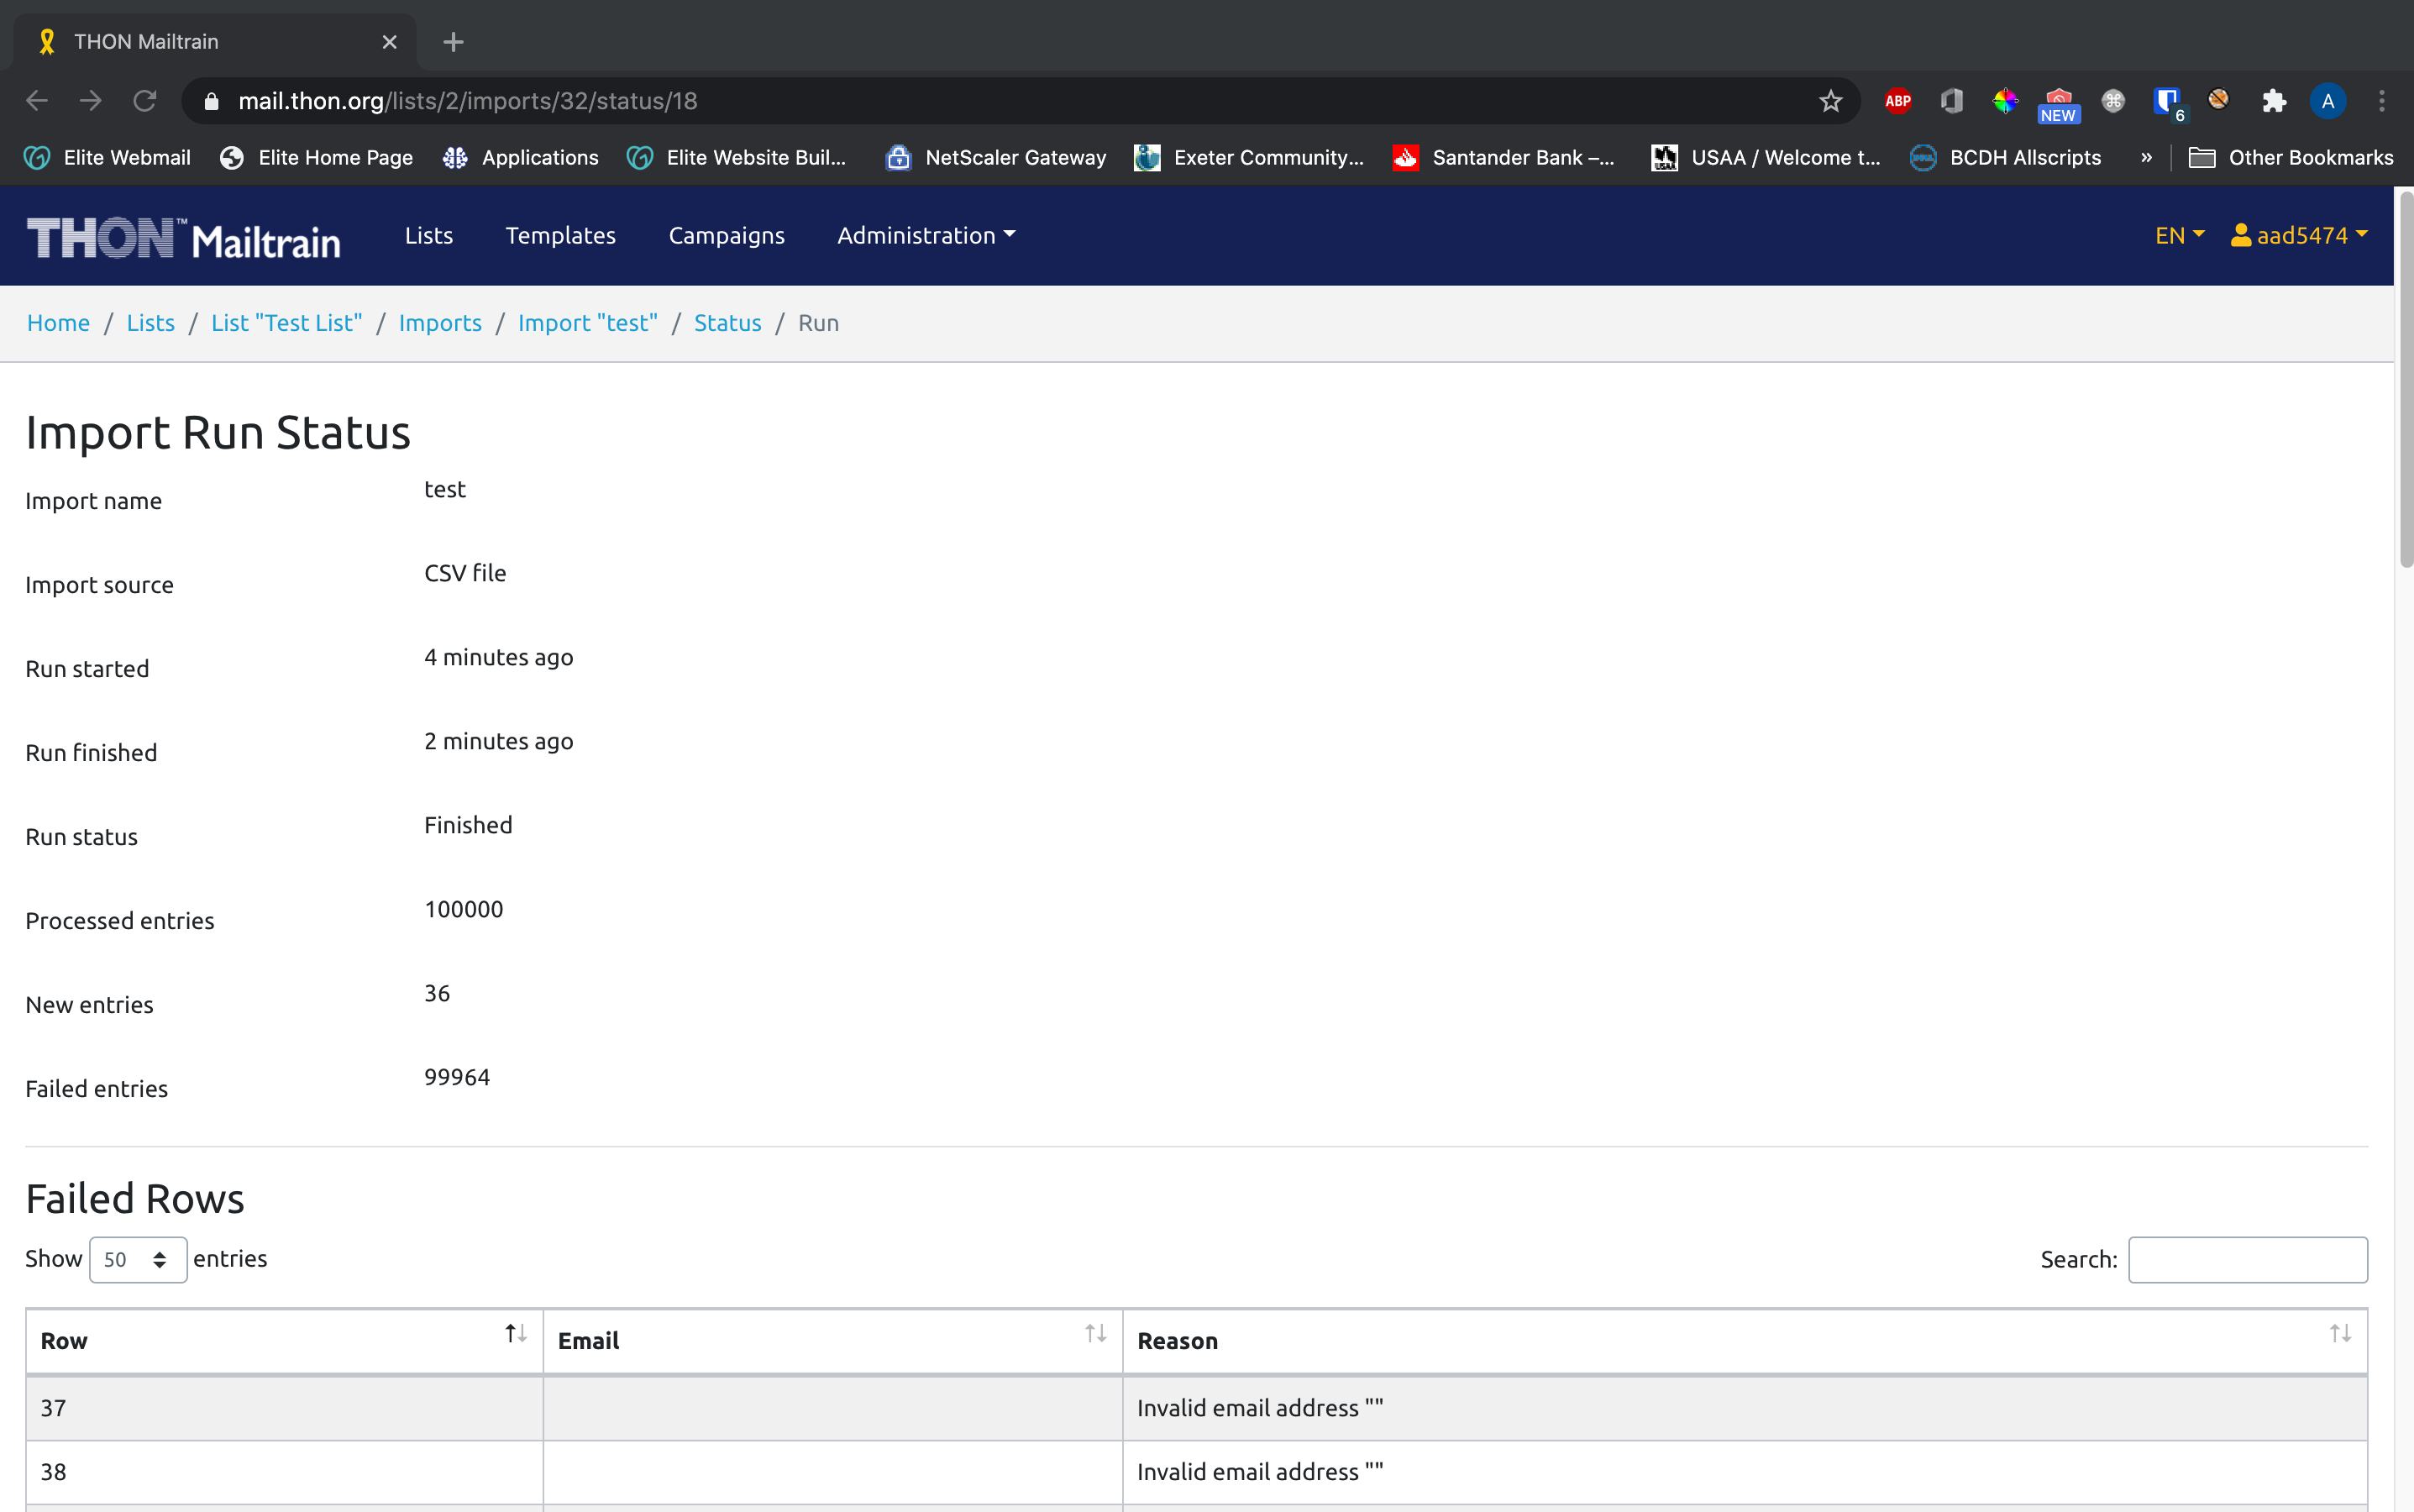
The most recent run will appear as a row in the table labelled Import Runs. The table contains information about the number of records that have been processed, number of records that were new to Mailtrain (and thus added to the list), and the number of failed records. Clicking the Eye Icon yields more diagnostic information about the import run, including the itemized list of rows that failed to import with reasoning:
Duplicate Email Prevention
Mailtrain makes it impossible to upload duplicate email addresses to the same list by design. For instance, if you created a CSV of 1000 email addresses, imported it, added 1 email address to the end of the file, and imported it again, only 1 person would be added to Mailtrain on the second import run.
Import Creation Troubleshooting
Admittedly, the import tool can be somewhat finnicky and sensitive to special characters. This section will contain rudimentary troubleshooting information for repairing imports.
Pre-Processing Errors
Pre-processing errors occur when the import status reads Preparation Failed. This is usually indicative of an error with the file itself. Try the following steps:
- Check the Error line on the Status page. The error will usually reference a line number corresponding the the line in the CSV that broke the tool. In a spreadsheet editor, examine this/surrounding rows for errors.
- Make sure the file you uploaded is a *.csv file. If you saved it from Excel as CSV, re-save it with the file type CSV (UTF-8)
- Double-check to ensure the file has the same number of columns in every row
- Double-check to ensure you included a header row
- Search and remove all special characters from the file, such as quotation marks and backticks
- If possible, simplify the file itself. If the file has multiple columns, but you only wish to extract the email column, consider removing the other columns and re-uploading
Import Run Errors
Some row will fail as the import itself runs. This is is usually because Mailtrain flags the row as invalid. To troubleshoot, click the Eye Icon and check the Reason column. The reason for failing is typically verbose and self.explanatory.
If you are unable to solve an import issue, don't hesitate to reach out at technology@thon.org for further assistance.